

Tuya-Convert: Escaping the IoT-Cloud, no solder needed
IoT company Tuya claims to have made over 11.000 products worldwide smart home ready, possibly gathering data from millions of homes in the process. If you don't want your information in the cloud, we show how to free your smart home devices simply by running a script.
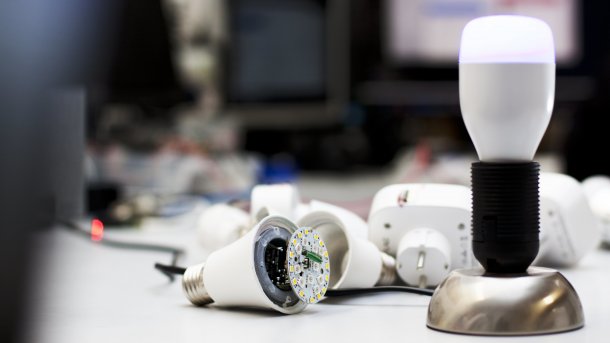
(Bild: VTRUST)
Entrepreneurs seeking a manufacturing partner to produce their smart home devices will quickly come across a Chinese company called Tuya. After paying a fee of 1500 USD, clients can put together their new smart home portfolio on Tuya's website with just a few clicks. A fully branded, cloud based app built according to your company's needs is part of the deal. While that sounds like a good offer for companies, German security expert Michael Steigerwald of the IT-Startup VTRUST has demonstrated that Tuya's self-proclaimed "military grade security" is sorely lacking.
During a talk at the 35th Chaos Communication Congress (35C3), Steigerwald demonstrated vulnerabilities in Tuya's provisioning procedure that allow intruders to hijack a device and modify its firmware. Since this procedure is unencrypted, attackers in range of the smarphone configuring the IoT device could "snoop" the Wi-Fi credentials. Also the keys used to encrypt and sign the MQTT communication between the devices and the cloud are sent using plain unencrypted HTTP.
The silver lining: These vulnerabilities can be used to free Tuya's devices from the cloud by replacing the pre-installed firmware with an open-source alternative. This way, your home doesn't have to talk to cloud servers just to switch on a wall socket. The best part is that this method doesn't require you to crack open the device or use a soldering iron. It's all done through a few simple scripts.
Following the 35C3 talk, VTRUST and German tech magazine c't sat down together to make the hack available to interested users everywhere. Because many of Tuya's Wi-Fi devices use the Espressif ESP8266, a number of mature and reliable firmware alternatives already exist and can easily be installed. Our scripts recreate Tuya's server environment locally, redirect the traffic there, and allow us to install an alternative firmware such as Sonoff-Tasmota.
Disclaimer
Before getting started, you need to be aware of the risks and consequences of flashing an alternative firmware, which can range from losing certain functionality to bricking the device. Tuya claims to provide cloud services for thousands of individual products. Therefore, neither VTRUST nor c't can guarantee that the hack will work with all of Tuya's products. Therefore, you are using this hack at your own risk.
As mentioned it is possible that certain features may no longer work with an alternative firmware. You may need to use a local smart home software (such as Node-Red) to get them back. Other parts of the device's hardware (e.g. chips for power measurement used in smart sockets) may become unusable, if there is no open source library available. Some battery powered Tuya devices may use a secondary microcontroller that communicates with the ESP8266/85 over a serial connection. This serial protocol isn't implemented in any alternative firmware at the moment.
This guide only covers flashing a minimal build of the open source ESP firmware Sonoff-Tasmota. Since Tasmota offers dynamic GPIO association, most simple switch-like devices will work with this firmware.

Identifying a Tuya device
It's not always easy to identify a Tuya device at a glance. You can start by checking the device list in the GitHub repository's wiki. If you device isn't listed, you can try to identifiy it by its properties: Some products sport QR code stickers with a small "t" in the middle. In other cases, the manual asks you to install Tuya's smart life app. If neither is the case, you can try adding your device via Tuya's app. Considering we're trying to keep your information out of the cloud, this would be defeating the purpose unless you've already entered your data another of Tuya's smart home apps.
Many Tuya devices create an Wi-Fi access-point if you press and hold the pairing twice. Press and hold the button until the LED flashes rapidly, then repeat until it blinks slowly. Open the Wi-Fi discovery dialog on one of your devices and look for a network named "Smart-Life-XXX". Even if you can't seem to find the network, you can try to proceed with the guide as it won't do any harm to your device if it's Tuya-made – it simply won't work.
Hardware requirements
The scripts should work on any Linux computer that has a WiFi adapter. Since we are unable to cover all distributions, this article only covers using the Raspberry Pi with either an external (required for RPi 1 and 2) or internal WiFi adapter (integrated since RPi 3) and a freshly installed copy of Raspbian Stretch Lite (without a graphical desktop).
If you're already using your Raspberry Pi as a smart home server or for other duties, we recommend using a fresh SD card with Raspbian on it for this procedure, so that you don't encounter any problems with your existing installation if something unexpected happens. It doesn't matter whether you're running this hack remotely via SSH or directly via a plugged in keyboard.
Installation
First boot your freshly installed Raspbian and log in to the terminal. Update the packet lists by typing:
sudo apt-get update
then install all the necessary updates:
sudo apt-get upgrade
You will need the version control software git to download the files from the repository:
sudo apt-get install git
Clone the repository by executing:
git clone https://github.com/ct-Open-Source/tuya-convert
Switch to the directory containing the script and tools and start installing the additional software required
cd tuya-convert
sudo ./install_prereq.sh

Reflash
Once the installation completes, type
sudo ./start_flash.sh
to run the flash script. Read the text carefully and acknowledge that you're using the hack at your own risk by typing yes and pressing enter.
The script now creates an access point and launches additional services (DHCP, DNS, MQTT & HTTP servers) needed for the hack to work. Tuya's smartconfig protocol used to configure the devices distributes the Wi-Fi credentials and the cloud token to the devices via UDP broadcast
This protocol is now being mimicked by your Raspberry Pi. Because it's WiFi adapter may not send out broadcast packets if there isn't already at least one client on the network, connect another wireless device to your Raspberry before you continue. A smartphone will suffice. The script displays the credentials in the terminal.
Smartconfig
Set your device to smartconfig mode .Devices that haven't previously been configured will likely automatically enter this mode. Otherwise, press and hold the pairing button until the LED starts to blink rapidly. If you can't find a dedicated pairing button, find the biggest or only button on the device. Once smartconfig mode has been activated, the LED on your device will blink rapidly. If you can't seem to get into smartconfig mode, check the manual for hints.
Once the device LED blinks, press Enter on your Raspberry Pi. It may take up to one minute until the device has received the smartconfig packets and connects to the Raspberry Pis WiFi network, so be patient. The LED usually stops blinking, once a connection was successful.
Undo / Alternative Firmware
While the scripts in the background are triggering the update procedure for the device which then downloads a temporary firmware, the terminal will display a line of dots as a sort of progress bar. Once the temporary firmware has connected to your Raspberry Pi, the script begins to create a backup of the original firmware.

With the backup done, the script shows the device properties. With the backup done, the script shows the device properties. Take note of the flash mode which may look like this: FlashMode: 1M QIO @ 40MHz. 1M(Byte) refers to the flash memory capacity, QIO denotes the flash mode and 40MHz the memory bus clock. If you flash an alternative firmware compiled with the wrong flash mode, the ESP may fail to boot. If this happens you will have to reflash it using the serial interface. Write down the output, so that this doesn't happen.
After the script has completed, you can either remove the temporary firmware by typing
curl http://10.42.42.42/undo
leaving you with the original firmware. Alternatively, you can install the included Sonoff Tasmota v6.4.1 minimal image. It uses the DOUT flash mode and will work on most devices:
curl http://10.42.42.42/flash3
The temporary firmware will download the file, write it to the flash memory and reboot the device. Because of the limited flash memory size we provide the "basic"-version of Sonoff-Tasmota. This variant opens an access point named something like "Sonoff-XXX".
Browse to http://192.168.4.1 to connect the device to your home network. If you would like to flash your own firmware right away, copy its file to the files folder in the tuya-convert folder and name it thirdparty.bin.
Documentation
By Tuya’s claims to have more than 10,000 different devices on the market, it’s safe to assume that those devices can be found on the shelves and in shops around the world. If you happen to find a Tuya device, help the community and let others know. To help with that, VTRUST and c't created a wiki in the GitHub repository, where you can add your device and provide additional information such as additional MCUs or GPIO assignments. You can also send us an e-mail to ctsmarthome@ct.de and tell us about your device.
Your contribution not only helps to document the scale of Tuya’s world, it also helps developers of alternative firmwares such as Sonoff-Tasmota, ESPEasy and Espurna to create device profiles. That makes it easier for users with less technical knowledge to free their devices from the cloud into a local smart home. We appreciate your support! (amo)
